Integrate Galvix & QuickBooks
Connecting QuickBooks to Galvix can help automate your sales tax compliance with minimal effort.
Once connected, Galvix will securely import the transaction, product, and customer data from your QuickBooks account.
And using this information, Galvix will be able to -
- Calculate Accurate Taxes: Determine the correct sales tax for each transaction, as required by state regulations.
- Prepare draft returns: Generate precise sales tax return drafts.
- Track Nexus: Track sales tax Nexus (the point at which your business must collect and remit taxes in a state) and highlight when thresholds are approaching, met or exceeded.
This guide provides clear, step-by-step instructions to help your team set up the integration quickly and confidently.
Here's what this guide covers -
How the Integration Works
Once your QuickBooks account is connected to Galvix, here’s what happens:
- Authentication : You authorize Galvix to securely access your QuickBooks data.
- Data Sync: Galvix imports your historical data, including invoices, credit notes, products, and customer records. After the initial sync, any new data in QuickBooks is synced with Galvix in real time.
- Tax Determination: Our tax engine determines the correct sales tax for each transaction and flags any differences (e.g., incorrect tax collections) for your review.
Only invoices and credit notes are supported by Galvix, as these are the only transaction types relevant for tax calculation and filing.
Step-by-Step Setup
Follow these steps to connect QuickBooks to Galvix:
Before starting the process to connect QuickBooks to your Galvix account, ensure that you have Admin access to the QuickBooks account.
-
Log in to your Galvix account
-
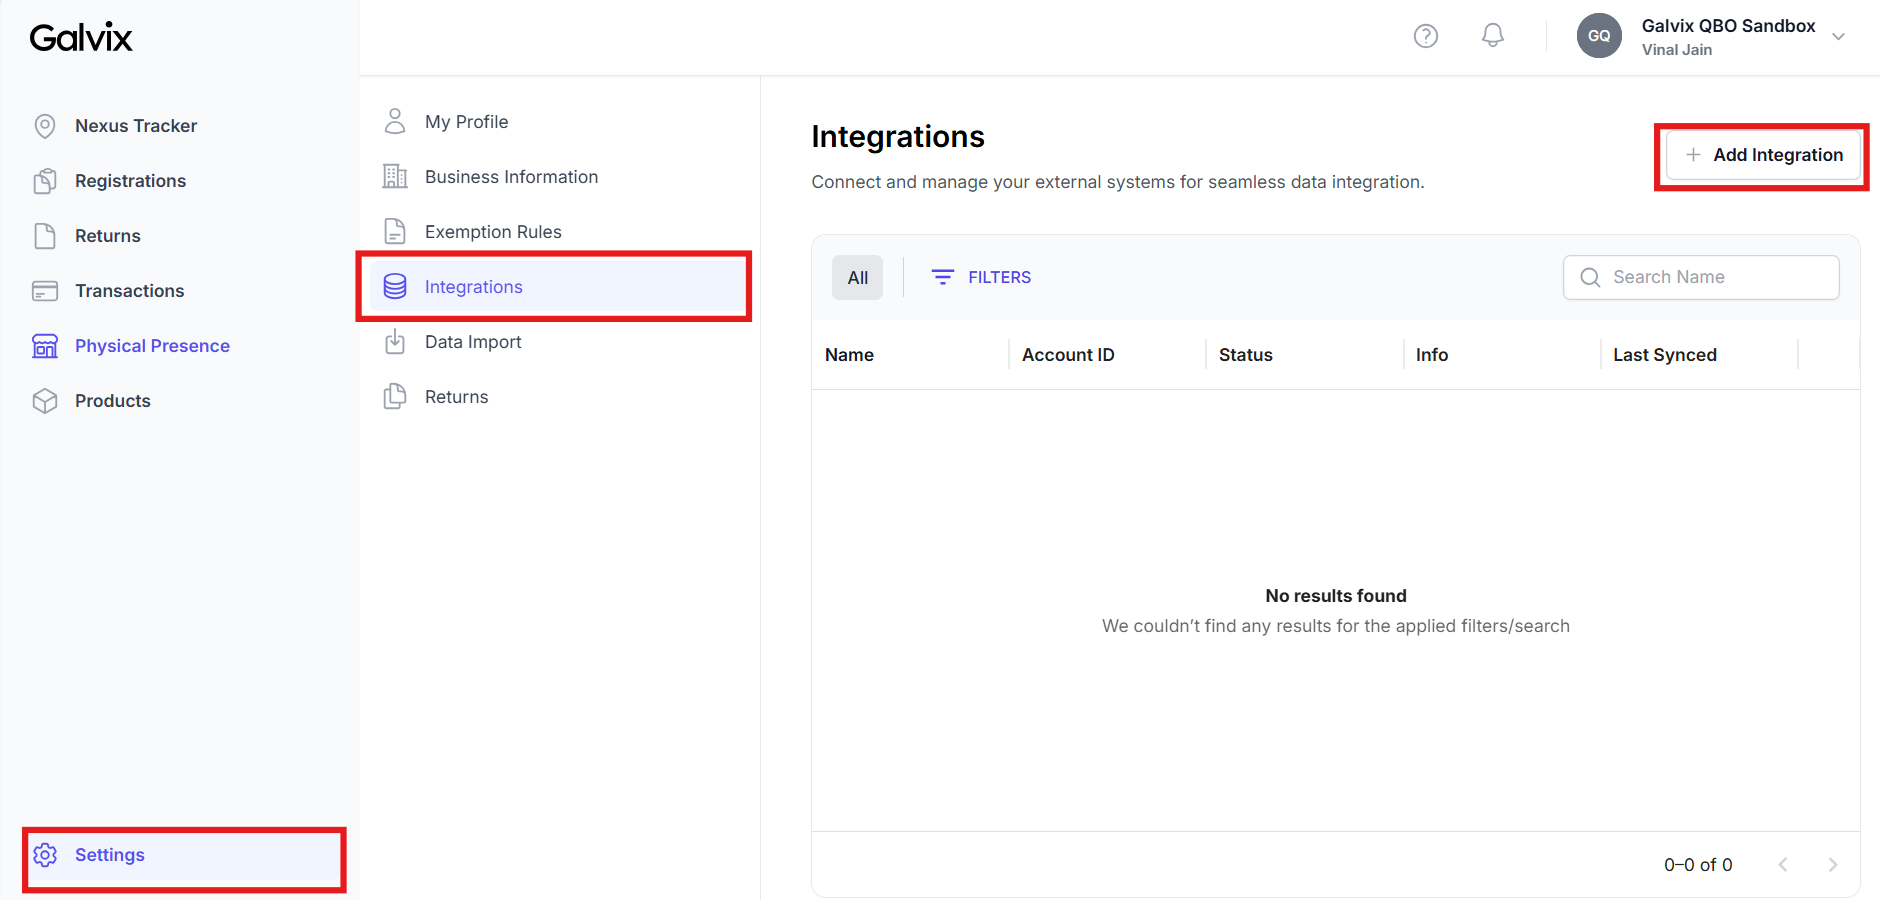
Go to Settings > Integrations > Click on +Add Integration
-
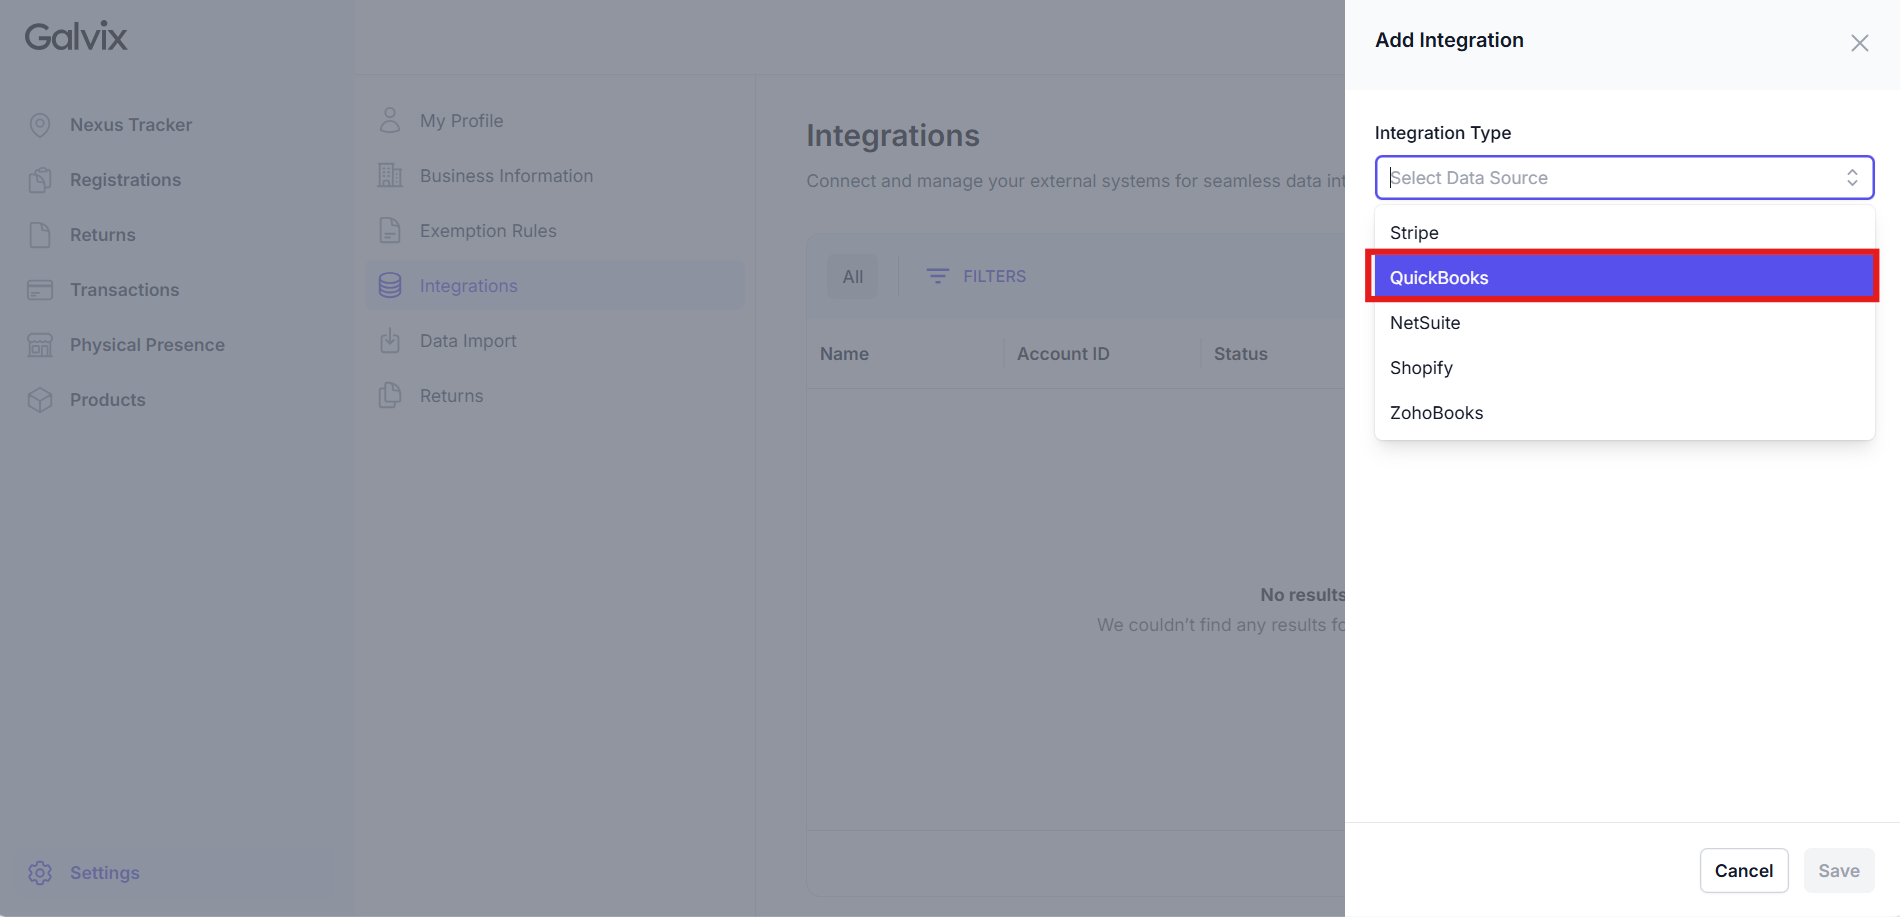
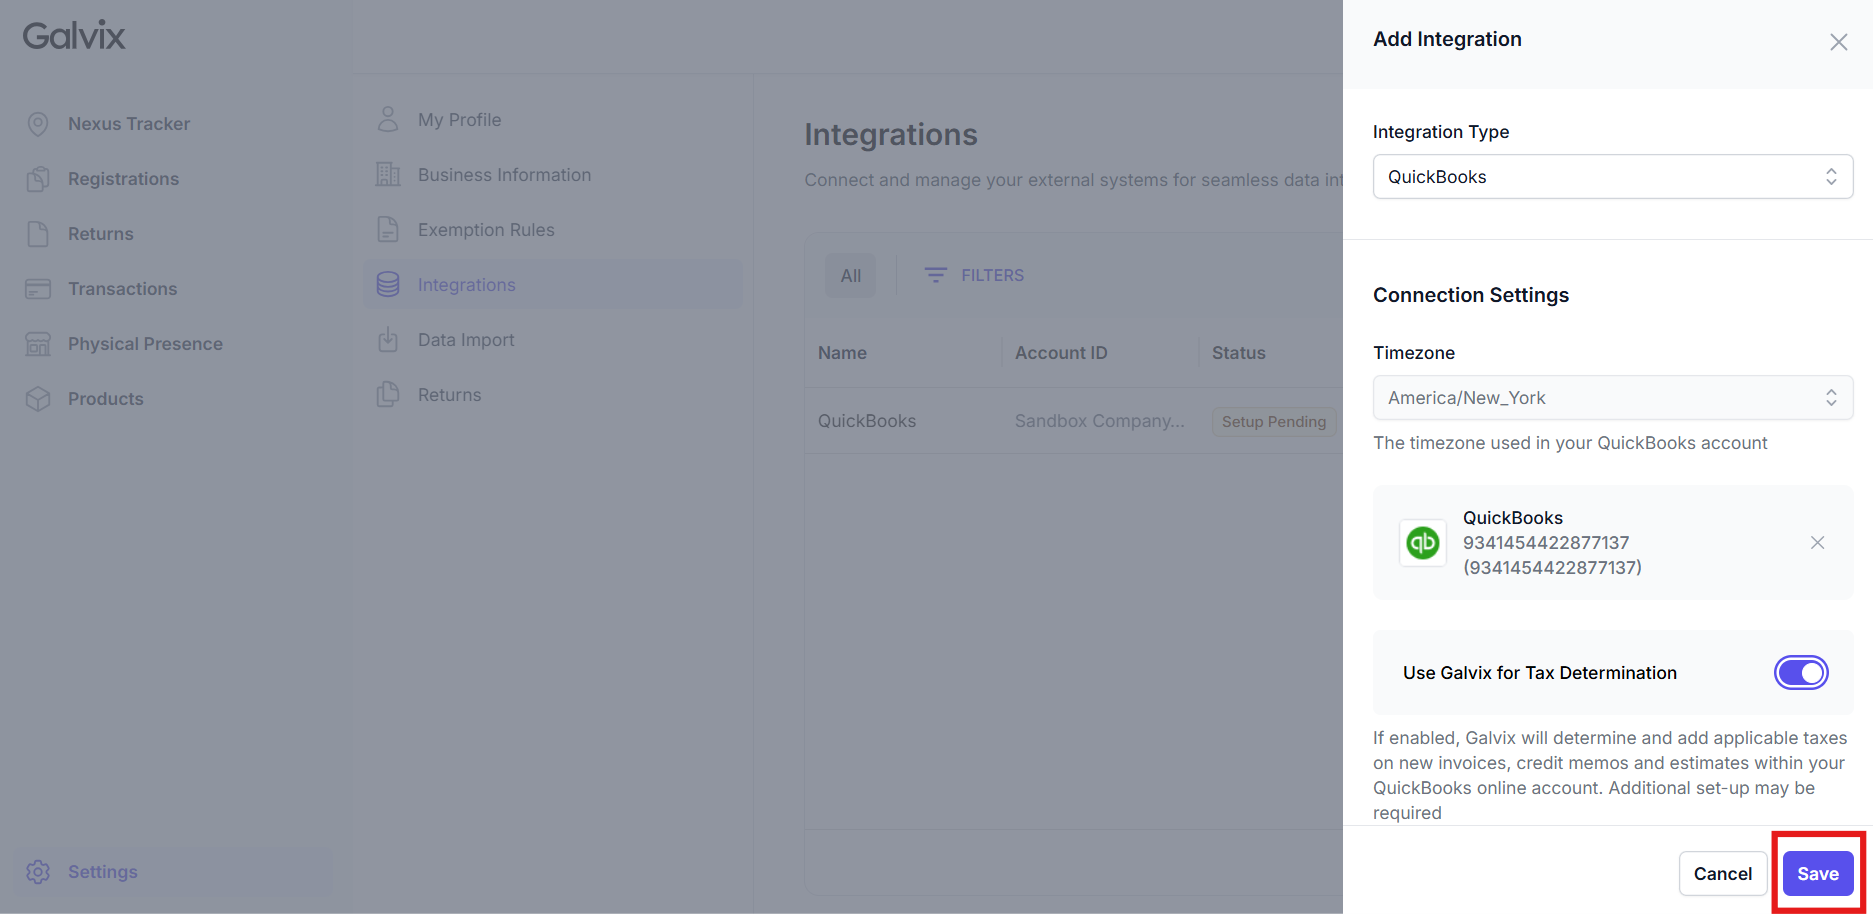
Select QuickBooks under Integration Type
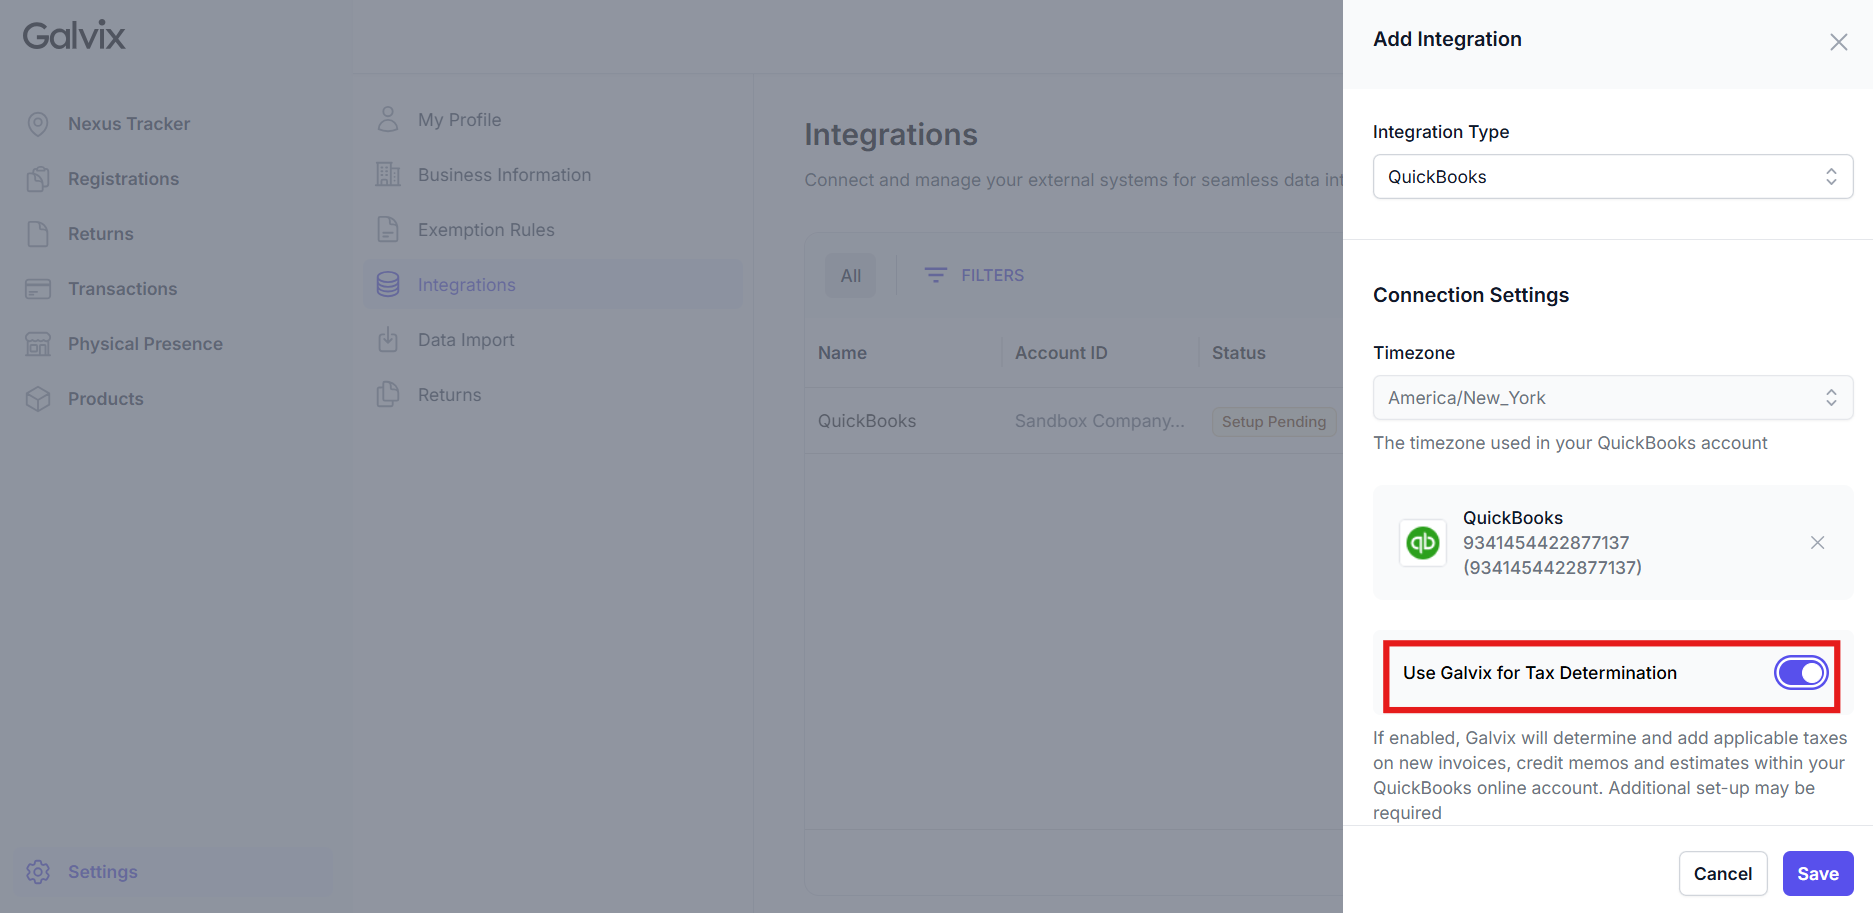
- Choose the Timezone that matches your QuickBooks account.


- Click on Connect to QuickBooks

- You will be redirected to QuickBooks login page. You should login to the account with admin permissions and select the company that must be connected to the Galvix account

- Click Next > Connect to permit Galvix to import data from QuickBooks


- You’ll be redirected to Galvix, where the integration will appear in the side panel, displaying your QuickBooks Account ID.

-
Turn on the Use Galvix for Tax Determination toggle.
This delegates the tax calculations to Galvix for all invoices and credit notes that will be created in QuickBooks.
-
Click Save to complete the setup


Once saved, Galvix begins syncing your existing QuickBooks data immediately. You’ll see one of the following statuses:
- Syncing – The sync is in progress. Depending on your data volume, it may take a few minutes to a few hours.
- Active – Your integration is live and syncing in real time.
- Error – Something may have gone wrong. Contact us at support@galvix.com and we’ll help resolve it.

Once the status is updated to 'Active', your connection has been completed.
After Connecting
Review your synced data under the Transactions and Products tabs in Galvix.
In Galvix, invoices are treated as Sale transactions and credit notes are treated as Refund transactions.

You have now successfully connected Galvix and QuickBooks!
Next Steps
Configure Your Account: Refer to our QuickBooks Configuration Guide to set up taxability and exemptions for customers.