Best practices for creating Invoices and Credit Notes in Zoho Books
To ensure Galvix calculates sales tax accurately, it's important to follow certain invoicing & credit notes creation practices in Zoho Books. This guide highlights the essential steps for creating an invoice or credit note, as well as key considerations to avoid.
Here's what is covered in this Guide -
- Provide Complete & Accurate Customer Addresses
- Select Correct Invoice Date
- Verify Setup Completion
- Creating an Invoice
- Editing an Invoice
- Creating a Credit Note
- Editing a Credit Note
- Next Steps
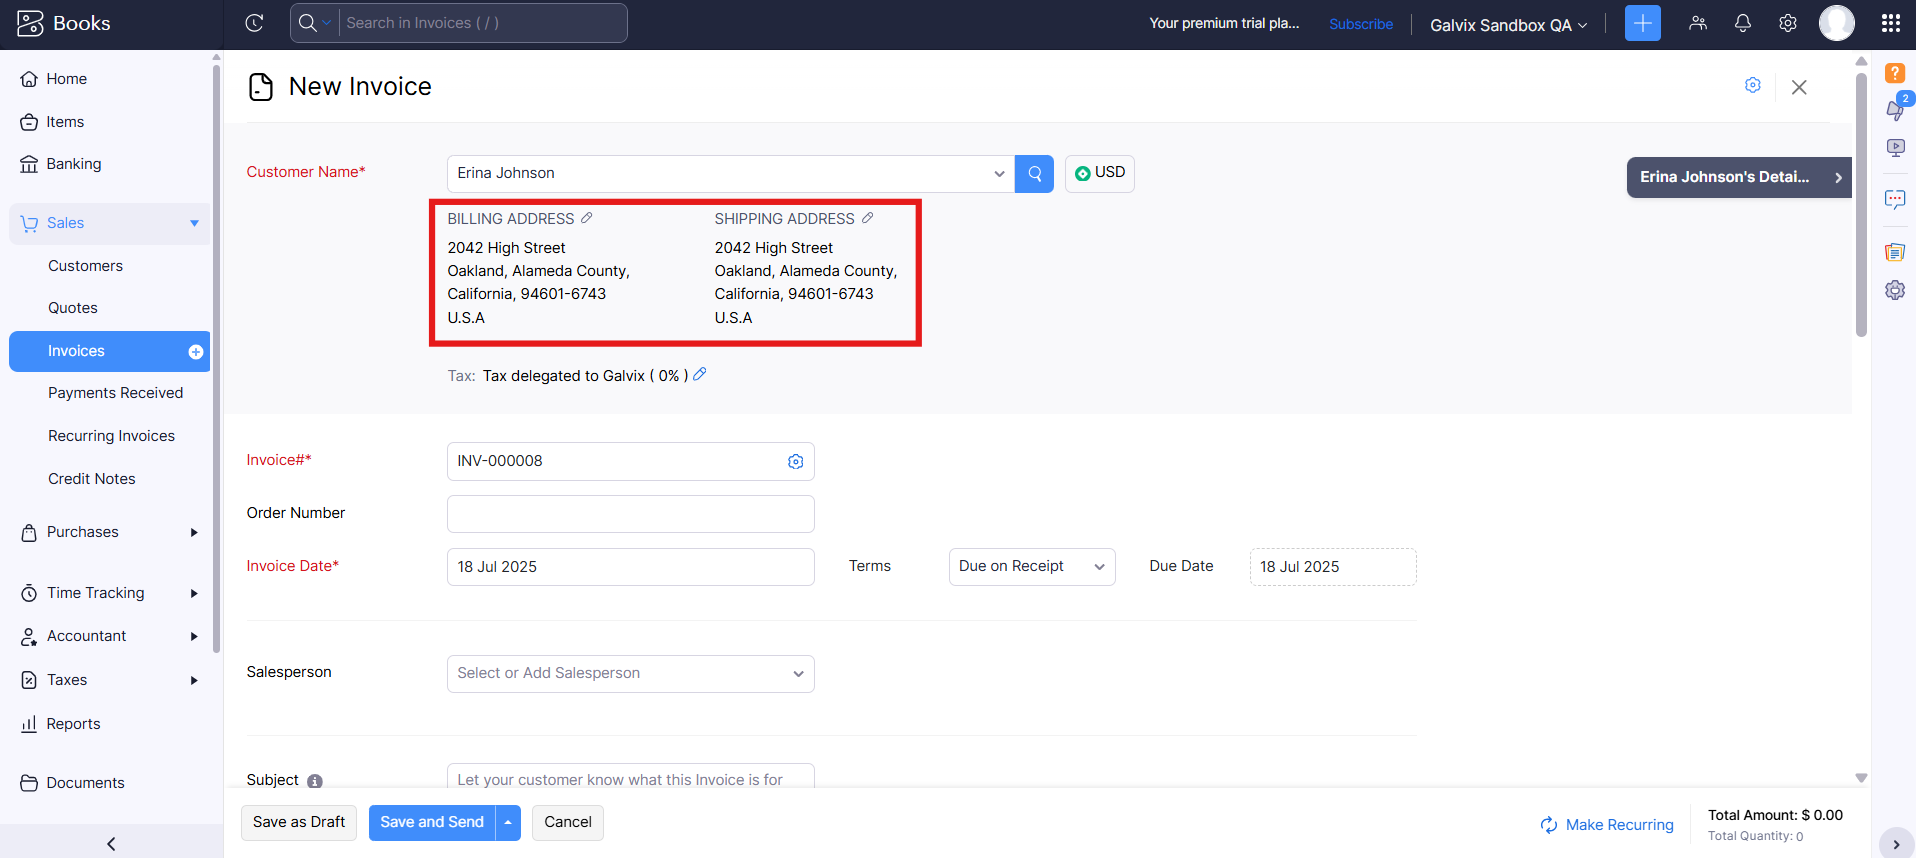
Provide Complete & Accurate Customer Addresses
Galvix relies on accurate shipping addresses from the transaction to determine the correct tax jurisdiction, as tax rates vary by zip code, city, and state. If a shipping address is not available, the billing address will be used for tax calculations.
When creating an invoice in Zoho Books, the address fields are pre-populated based on the values saved in the customer record. However, if you manually update these fields to a different address. Galvix will always use the address specified on the invoice or credit note, not the customer record, for tax calculations.
For precise tax calculations, it is recommended to include the following address details in your invoice or credit note :
- Full street address
- City, state, county, and country
-
9-digit zip code (e.g., 12345-6789) for enhanced accuracy

Select Correct Invoice Date
Galvix uses the invoice date to determine which tax return period a transaction belongs to. To avoid exclusion from return calculations:
- Choose an invoice date in the current or future month. Past-dated invoices (e.g., from a previous month) may get excluded if a return has already been filed by Galvix for that period.
Verify Setup Completion
Before creating invoices, confirm that your Zoho Books account is properly configured for Galvix:
- Integration: Ensure Zoho Books is successfully connected to Galvix (see our Zoho Books Integration Guide).
- Configuration: Complete all Zoho Books configuration steps, including customer taxability settings (see our Zoho Books Configuration Guide).
Creating an Invoice
Follow this recommended workflow to create invoices in Zoho Books, ensuring accurate tax calculations by Galvix.
Steps to Create an Invoice:
- In Zoho Books, go to Sales > Invoices.
- Click + New to create a new invoice.
- Under Customer, select an existing customer or add a new one.
- Set the Invoice Date to the current or future month.
- In the Item Table > Item Details, select a Taxable product from the dropdown.
Ensure your products are assigned to the correct tax categories in Galvix! Follow this guide to verify and set them up accurately.
- Add optional Shipping Charges or Discounts if applicable.
- Click Save as Draft to allow Galvix to calculate taxes.
- Wait for approximately a minute for Galvix to add taxes to the draft invoice. Refresh the preview page to view the updated tax amount.

- Review the taxes, and you are ready to print, send, or share the invoice with your customer.
Editing an Invoice
To ensure Galvix accurately updates sales tax calculations when editing an invoice in Zoho Books, follow the recommended workflow below. This guide ensures seamless tax updates and compliance.
Steps to Edit an Invoice:
- In Zoho Books, go to Sales > Invoices.
- Open the existing invoice you want to edit.
- Click Edit on the invoice preview page.
- Make necessary changes (e.g., update customer, items, shipping charges, or discounts).
- Click Save as Draft to allow Galvix to recalculate taxes.
- Wait approximately a minute for Galvix to update the taxes on the draft invoice. Refresh the preview page to view the updated tax amount.
- Review the taxes to ensure accuracy.
- You are ready to print, send, or share the invoice with your customer.
Creating a Credit Note
Follow this recommended workflow to create credit notes in Zoho Books, ensuring accurate tax calculations by Galvix.
Steps to Create a Credit Note:
- In Zoho Books, go to Sales > Credit Notes.
- Click + New to create a new credit note.
- Under Customer, select an existing customer or add a new one.
- Set the Credit Note Date to the current or future month.
- In the Item Table > Item Details, select any product from the dropdown.
Ensure your products are assigned to the correct tax categories in Galvix! Follow this guide to verify and set them up accurately.
- Add optional Shipping Charges if applicable for refund.
- Click Save to allow Galvix to calculate taxes.
- Wait for approximately a minute for Galvix to add taxes to the draft credit note. Refresh the preview page to view the updated tax amount.
- Review the taxes, and you are ready to print, send, or share the credit note with your customer.
Editing a Credit Note
To ensure Galvix accurately updates sales tax calculations when editing an Credit Note in Zoho Books, follow the recommended workflow below. This guide ensures seamless tax updates and compliance.
Steps to Edit a Credit Note:
- In Zoho Books, go to Sales > Credit Note.
- Open the existing credit note you want to edit.
- Click Edit on the credit note preview page.
- Make necessary changes (e.g., update customer, items, shipping charges, or discounts).
- Click Save to allow Galvix to recalculate taxes.
- Wait approximately a minute for Galvix to update the taxes on the credit note. Refresh the preview page to view the updated tax amount.
- Review the taxes to ensure accuracy.
- You are ready to print, send, or share the credit note with your customer.
Next Steps
Now that your Galvix & Zoho Books integration is complete, you may explore our Zoho Books FAQ guide.